Web Scraping with Selenium and Beautiful Soup to Create Models in Django
Introduction
In this tutorial, I’ll give a basic introduction to web scraping with Selenium and Beautiful Soup, and integrating these tools into a Django project. We’ll make a web scraper that grabs data from an external source, and creates new Django model objects directly from that data. This guide assumes you have a general understanding of the Django framework, and a working project to start with.
We’ll be working with a Django website that serves as a platform for reviewing Nintendo Switch games. Each game on our website is represented by a game model with fields for the title, description, price, etc. Rather than entering this information manually every time we add a new game, we’ll use our web scraper to get this information directly from Nintendo’s website. By the end of this tutorial, we’ll be able to enter the URL of the game we want to add into a custom page within the admin panel, and our Django project will scrape the data we need and create a new game listing for us.
Overview
We’ll be using the following tools:
The Selenium API is a powerful browser automation tool, and we’ll be using it to open up a new browser window, navigate to the webpage we want to scrape, and grab a copy of the page’s HTML source. Note that the Requests python library can also be used for this process and is actually easier to implement, but I chose to use Selenium for reasons explained later.
Geckodriver allows the Firefox browser to be controlled remotely. In this project, it serves as an interface between Selenium and Firefox - webdriver calls sent by Selenium will be translated into the Marionette Remote Protocol understood by Firefox. ChromeDriver is the equivalent tool for Google Chrome.
Beautiful Soup is a Python library for parsing and extracting data from HTML and XML files. After getting a copy of the website using Selenium, we’ll use Beautiful Soup to parse the HTML code and extract the data we want.
This tutorial can be broken down into the following steps - skip ahead to whatever section sounds most useful!
- Installing the necessary tools
- Creating our python script for web scraping
- Updating the admin panel to automatically create a new model instance
Installing Selenium, Beautiful Soup, and Geckodriver
Within our Django project, let’s first make sure we’re working within a virtual environment (venv). This provides an isolated space to install python packages, ensuring we won’t get any conflicts with other projects. If you don’t yet have a venv, you can read more about them here.
Within the venv, we can then install Selenium and Beautiful Soup using the following commands:
pip install selenium
pip install beautifulsoup4
That’s it! Those are the only additional python packages we need. We can update requirements.txt to reflect these changes:
pip freeze > requirements.txt
Next, we need to install the correct driver for our browser. As mentioned before, if you use Firefox you’ll need Geckodriver, and if you use Google Chrome you’ll need ChromeDriver. Installation varies between driver and OS. I personally use Firefox. On my Linux machine, no additional setup was necessary to get Geckodriver working - its included with the Firefox package on most distributions. On Windows the process is a bit more involved, but here’s a great guide to get you started.
Creating the web scraper
With the necessary tools installed, we can create a python script scraper.py to implement our web scraper. Where you place this script depends on the layout of your project; I chose to place mine within the Django app directory so that I can easily access it from admin.py. The layout might look something like this:
django_project
|-- django_project
|   |-- __init__.py
|   |-- __pycache__
|   |-- asgi.py
|   |-- settings.py
|   |-- urls.py
|   `-- wsgi.py
|-- djvenv
|-- manage.py
|-- requirements.txt
`-- django_app
    |-- admin.py
    |-- apps.py
    |-- forms.py
    |-- migrations
    |-- models.py
    |-- scraper.py <--- Our added python script
    |-- templates
    |-- tests.py
    |-- urls.py
    `-- views.py
Open the script with your editor of choice and let’s get started. First we need to import Selenium and Beautiful Soup:
from selenium import webdriver
from bs4 import BeautifulSoup
I chose to place the web scraper within a python function that I can call from elsewhere in my Django project. We’ll pass the URL of the website we want to scrape to this function.
def ScrapeURL(URL):

    ... more code here...
Within the function, we start a new session with Selenium by creating a driver object, specifying the browser we wish to use. Then we tell the browser to open the website at the given URL - in our case, we’ll be sending it the URL of a game on the Nintendo website:
driver = webdriver.Firefox()
driver.get(URL)
Let’s test our function to make sure everything is installed correctly:
from selenium import webdriver
from bs4 import BeautifulSoup
def ScrapeURL(URL):
driver = webdriver.Firefox()
driver.get(URL)
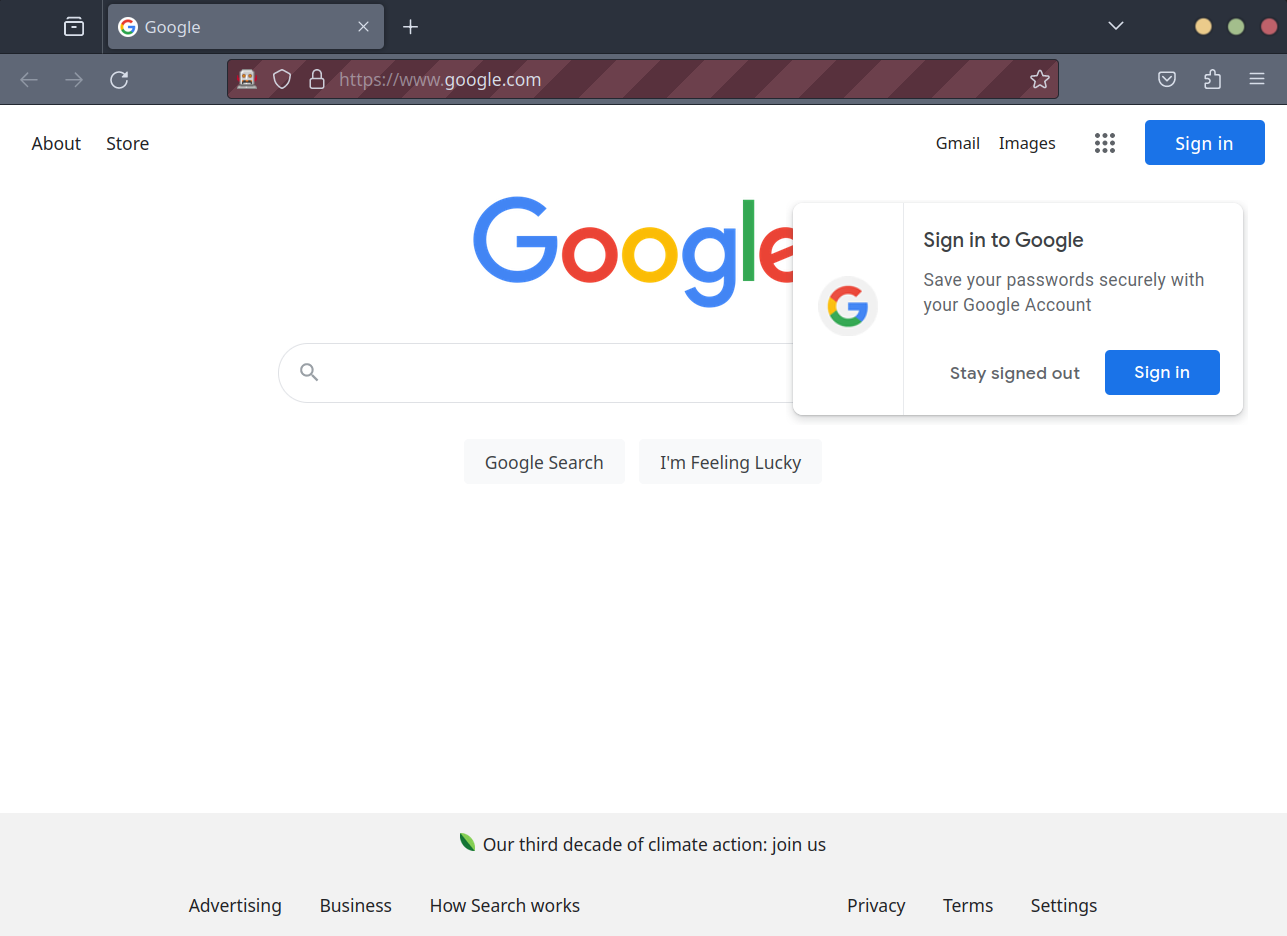
testURL = "https://www.google.com/"
ScrapeURL(testURL)We can run this script with python scraper.py. We should see a new Firefox window open up and navigate to Google.
Now we know that Selenium and Geckodriver are installed and working. Depending on the website you wish to scrape, you can then save the page source and move on to extraction with beautiful soup. However, when looking at a game listed on Nintendo’s website, the game’s price is loaded after the rest of the page contents. We need to tell Selenium to wait until the price has loaded before we proceed.
We can do this using an explicit wait, which tells the program to loop until a specific condition is met. Selenium offers many different waiting strategies, but we choose to wait until a specific element - the price, in our case - is loaded. We identify this element using a CSS selector, which we can find by opening up a game page on the Nintendo website, and inspecting the game’s price with our browser.
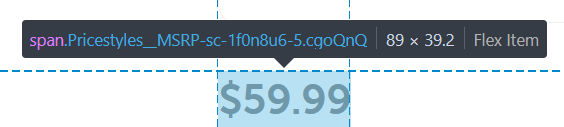
Looking at the above screenshot, we can see the game price is placed within a span HTML tag with the cgoQnQ class. Therefore, the correct CSS selector will be span.cgoQnq. The final explicit wait code is shown:
 try:
    element = WebDriverWait(driver=driver, timeout=5).until(EC.presence_of_element_located((By.CSS_SELECTOR, "span.cgoQnQ")))
except:
    print("Unable to detect price")
The above code will wait 5 seconds (as specified with timeout=5) for the price element to load. If that fails, we’ll print a message that the price couldn’t be found and move on. We then copy the page source, and close our session:
page_source = driver.page_source
driver.quit()
We can now send the HTML source over to Beautiful Soup to extract our data. We create a new soup object from the page source, and specify the HTML parser. We then filter the soup down to only include the elements within the main tag:
soup = BeautifulSoup(page_source, 'html.parser')
results = soup.find(id="main")
The soup is actually a complex tree of python objects - each tag in the original HTML source corresponds to a tag object in the soup. We can search through the soup and find specific objects using the .find method.
For example, we want to extract a game’s title from the HTML source we pull from a game listing on Nintendo’s website, and we need a way to identify the title element. We’ll do this using the title element’s HTML tag and class, which we can find by opening the game listing in a browser and inspecting the element. We get the following:
<h1 class="Headingstyles__StyledH-sc-s17bth-0 eQifGC">The Legend of Zelda™: Breath of the Wild</h1>We’ve got an <h1> tag with the following class: Headingstyles__StyledH-sc-s17bth-0 eQifGC. We can now filter our soup and find that matching object using the .find method, specifying the tag and class, as shown:
title = results.find("h1", class_="Headingstyles__StyledH-sc-s17bth-0 eQifGC") The .find method will return an object for that element, so we grab the text using the .text attribute. The final code for extracting the game title from the soup is shown:
try:
    title = results.find("h1", class_="Headingstyles__StyledH-sc-s17bth-0 eQifGC").text
except:
    title = "null"
We’ll use this data to create Django models later on, so we need to ensure that even if the desired element isn’t found, we aren’t leaving any fields blank - hence the try block. We can repeat this process for the other elements we want: price, heading, description.
try:
title = results.find("h1", class_="Headingstyles__StyledH-sc-s17bth-0 eQifGC").text
except:
title = "null"
try:
price = results.find("p", class_="Textstyles__StyledPara-sc-w55g5t-4 dQCCpW RadioDetailedstyles__Price-sc-d1kg1d-5 cTzeTR").text
except:
price = "null"
try:
heading = results.find("h2", class_="Headingstyles__StyledH-sc-s17bth-0 vsVuC").text
except:
heading = "null"
try:
description = results.find("div", class_="RichTextstyles__Html-sc-16r5mbt-1 kdsZWM clamp").text
except:
description = "null"
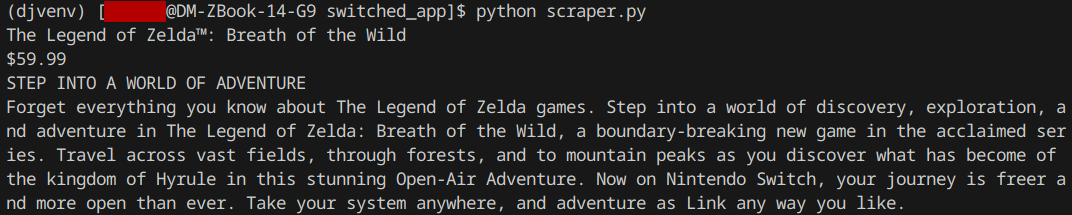
return [title, price, heading, description]If we run the script again and print out the title, heading, description, and price, we see that everything was scraped as intended!
Our scraper function will then return this data in the form of a list. The full scraper.py code is shown:
from selenium import webdriver
from bs4 import BeautifulSoup
from selenium.webdriver.support.wait import WebDriverWait
from selenium.webdriver.support import expected_conditions as EC
from selenium.webdriver.common.by import By
def ScrapeURL(URL):
# Start a new session, open the given URL
driver = webdriver.Firefox()
driver.get(URL)
# Wait for price element to show
try:
element = WebDriverWait(driver=driver, timeout=5).until(EC.presence_of_element_located((By.CSS_SELECTOR, "span.cgoQnQ")))
except:
print("Unable to detect price")
# Grab page source and close session
page_source = driver.page_source
driver.quit()
# Moving to beautfiful soup to parse data
soup = BeautifulSoup(page_source, 'html.parser')
results = soup.find(id="main")
try:
title = results.find("h1", class_="Headingstyles__StyledH-sc-s17bth-0 eQifGC").text
except:
title = "null"
try:
price = results.find("p", class_="Textstyles__StyledPara-sc-w55g5t-4 dQCCpW RadioDetailedstyles__Price-sc-d1kg1d-5 cTzeTR").text
except:
price = "null"
try:
heading = results.find("h2", class_="Headingstyles__StyledH-sc-s17bth-0 vsVuC").text
except:
heading = "null"
try:
description = results.find("div", class_="RichTextstyles__Html-sc-16r5mbt-1 kdsZWM clamp").text
except:
description = "null"
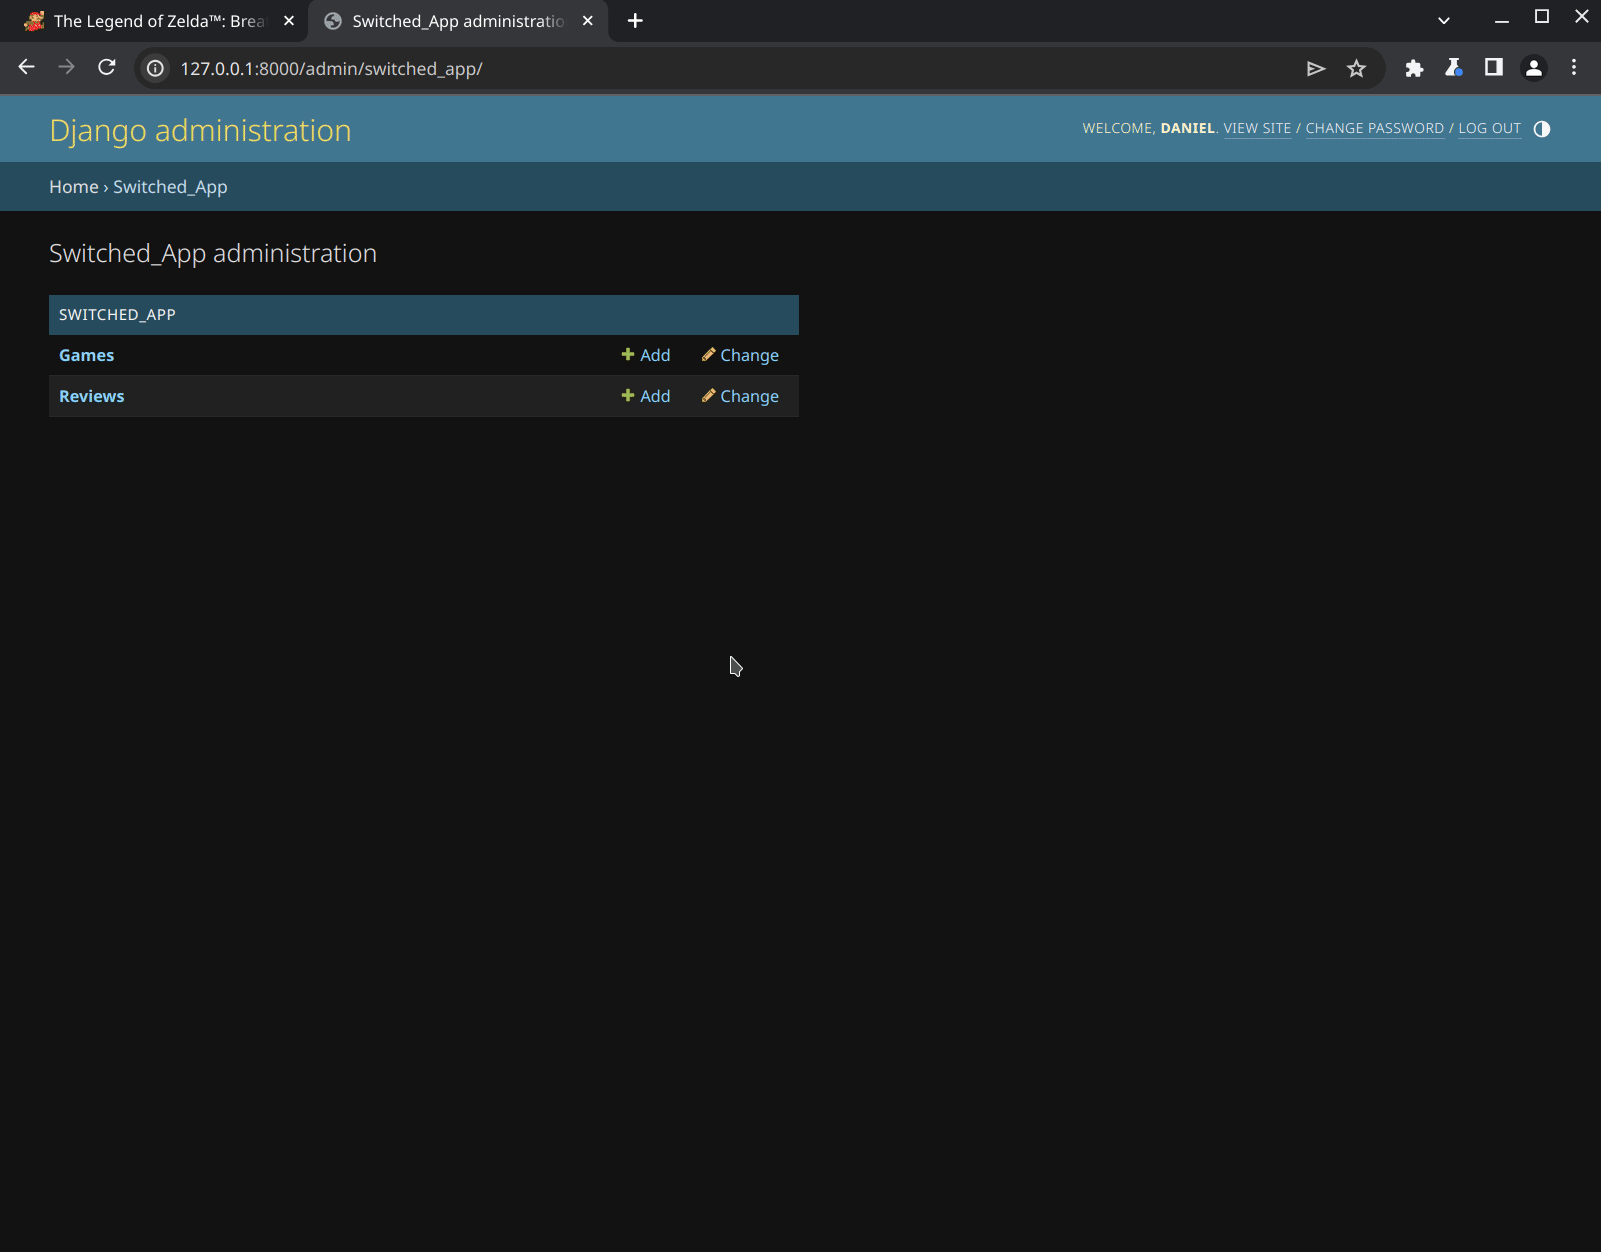
return [title, price, heading, description]Adding a URL upload to the Admin Panel
We have a python function that takes a URL, scrapes the website, and returns a list with the desired game data. Now we need to use this data to create a new game. Our game model has the following fields:
- title
- price
- heading
- description
We need to customize our admin panel and add a new page where we can submit a game URL. First, we override the default change_list template to include a link to our custom page. We create a new change_list.html file and place it withing the templates folder. You’ll need to create a few subdirectories for this template, following this structure:
templates/admin/[Django app name]/[model name]/change_list.html
The directory tree for you template file should have a similar structure to this:
django_project
|-- django_project
`-- django_app
    `-- templates
        `-- admin
            `-- django_app
                `-- model_name
                    `-- change_list.html <--- Our new template
Within our change_list.html file, we extend the base change_list template to add a link to a custom create-game page that we’ll add later:
{% extends 'admin/change_list.html' %}
{% load static %}
{% block content %}

<a href="create-game">Create new game from url</a>

{{ block.super }}
{% endblock %}
If we start our server and navigate back to the admin page, we can see the new link. Clicking it won’t take us anywhere because we don’t have the matching URL pattern, but we’ll add that next.
Withing admin.py, we need to import our scraper function and a few additional Django libraries for our URL and view functions.
from .models import Game
from django.template.response import TemplateResponse
from django.urls import path
from django.shortcuts import render
from django.shortcuts import redirect
from django import forms
from .scraper import ScapeURL
We then create a custom form. The admin will submit a URL, so we choose a URLField which will validate the submitted value for us:
class GameForm(forms.Form):
    game_url = forms.URLField()
Now, we create a custom ModelAdmin. The ModelAdmin defines the interface through which we interact with our models in the admin panel.
Within our ModelAdmin, we first need to extend the get_urls method - this allows us to add a new URL for our custom create-game page. We map this URL to the create_game view function that we’ll add next.
class GameAdmin(admin.ModelAdmin):
    def get_urls(self):
        urls = super().get_urls()
        new_urls = [path("create-game/", self.admin_site.admin_view(self.create_game))]
        return new_urls + urls
Now we can create a view function within our ModelAdmin for our custom game page. If our view function receives a valid HTTP POST request, we then fetch the URL from the submitted form.
We can pass this URL directly to our ScrapeURL function, which will return a list with the scraped data. We then create a new game object, and set each model field to the correct value from the list. Finally, we save our new model to the database and redirect to the admin index page. The full view function is shown below:
def create_game(self, request):

    if request.method == 'POST':

        URL = request.POST.get('game_url')

        data = ScrapeURL(URL)

        # Create a new game from scraped data
        game = Game()
        game.title = data[0]
        game.price = data[1]
        game.heading = data[2]
        game.description = data[3]

        game.save()

        return redirect('admin:index')

    form = GameForm()
    context = {"form": form}
    return render(request, 'admin/game_form.html', context)
Don’t forget to register the new ModelAdmin:
admin.site.register(Game, GameAdmin)Now we just need to create the game_form.html template and place it within our templates/admin directory, as shown:
django_project
|-- django_project
`-- django_app
    `-- templates
        `-- admin
            `-- game_form.html <-- Our new template
The contents of game_form.html are shown below. We extend the base admin template, import the game form passed into this template as context by our view function, and provide a submit button.
{% extends 'admin/base.html' %}
{% block content %}
<div class="container-sm">
<form action="" method="POST">
{% csrf_token %}
<table>
{{ form.as_table }}
</table>
<input id="id_submit" type="submit" name="Submit">
</form>
</div>
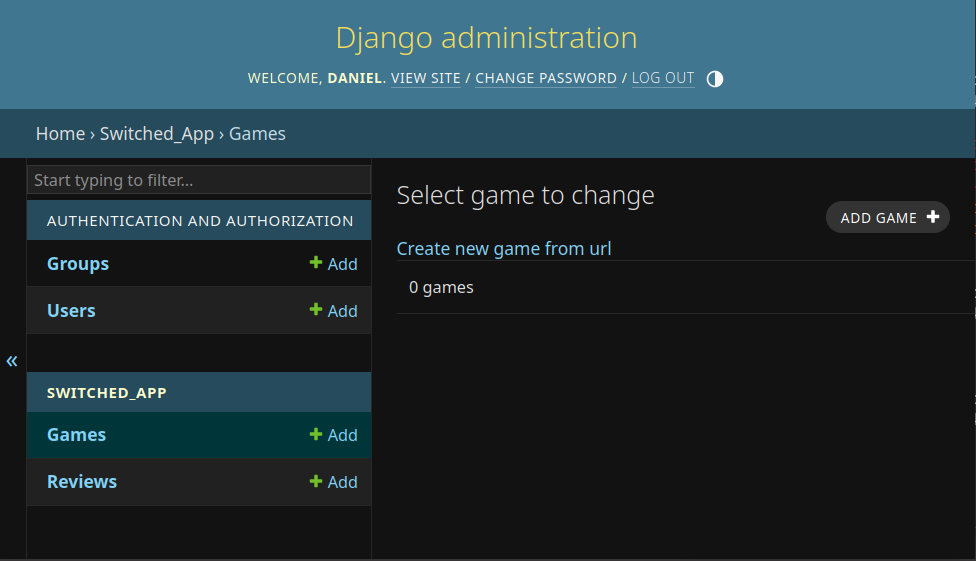
{% endblock %}We should have a custom page in our admin panel that allows us to create a new game model directly from a URL. Lets test it out:
It works! We can enter the URL for a game into our custom admin page, and the web scraper will grab all the information we need. Then, our new ModelAdmin will create a game object from that data.
Conclusion
I hope you find this tutorial helpful! The web scraping tools here - Selenium, Beautiful Soup - are very powerful, and this should serve as a simple yet practical introduction to how they can be used and integrated with Django.
Here are some additional resources you might find useful: