VS Code on iPad - Using Proxmox and Tailscale to Securely Host Code-Server
Introduction
Apple markets the iPad Pro as a serious tool capable of even the most demanding tasks, but sadly I’ve found my iPad to be quite limited for my personal workload. Its perfect for taking handwritten notes… and that’s about it.
But that changes today! By the end of this tutorial, we’ll be able to access Visual Studio Code on the iPad and work within a fully featured Linux environment using code-server. Even better, we can access code-server from any device, giving us a consistent cross-platform development environment.
Background
At the heart of this project lies code-server, an open-source project that will provide us with a full VS Code IDE accessible from a web browser. Code-server is compatible with most VS Code extensions, and it provides a similar experience to running VS Code locally for many tasks.
We’ll need a place to run code-server as well - that’s where Proxmox comes in. Proxmox Virtual Environment is a flexible virtualization platform that we can use to host a Linux VM. This VM will become our dedicated development environment that we can access anywhere through code-server.
We’ll need a secure way to reach our code-server environment. Tailscale will allow us to access code-serve from the internet through an encrypted VPN tunnel. In addition, Tailscale provides an easy way to generate a trusted TLS certificate so that we can host code-server over HTTPS.
Setting up the Linux VM on Proxmox
While you can certainly run code-server on bare metal, I chose to install it within a Linux VM on my Proxmox server. Not only can we customize this VM to create the perfect development environment for our needs, we can use our Proxmox server for so much more - file server, Pi-hole, Home Assistant, etc.
The Proxmox server doesn’t need to be anything fancy either. I’m using an old Dell Precision desktop with a 4th gen Core i5, 16gb ram, and a couple SSD’s and HDD’s for storing VMs and ISOs. All told, less than $100 of hardware that can easily be found on the second hand market. Despite the 10-year old processor, performance is just fine for my needs - if anything, power efficiency is the bigger issue.
I won’t be covering the process of installing Proxmox because it will differ depending on your hardware and use case. The process is fairly straightforward, and here’s a great tutorial to get you started.
With a working Proxmox installation, we can now create our Linux VM. First, we need to download the ISO of our Linux distribution. Keep in mind, if you’re only going to access this environment though code-server, there’s no reason to have a display server, audio server, desktop environment, etc. Stick with a lighter distro - for example, use Ubuntu Server instead of Ubuntu Desktop. I’ll be using Arch Linux, because it’s highly customizable.
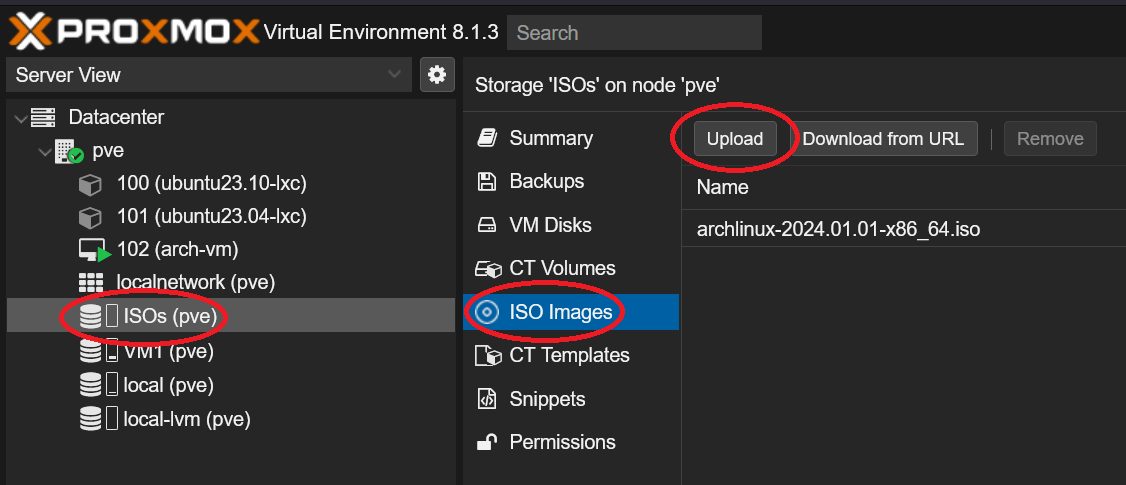
Next, we need to upload the ISO to our Proxmox server. Open a web browser and log into the Proxmox admin panel. On the left hand side of the Proxmox main menu, select a storage directory for the ISO. If you have a dedicated ISO disk, select that disk from the drop-down menu. Otherwise, select local. Once you’ve selected a directory, select the ISO Images tab and click Upload.
We can now create the VM. Start by clicking the blue Create VM button at the top right corner of the Proxmox admin panel. A new window will open up for configuring the following:
General- Enter a name for the virtual machine.OS- Select the storage location we previously uploaded our ISO to, and select the ISO file.System- You can leave these settings at the default values.Disks- Choose a storage location and disk size for your VM. I went with 32GB which should be plenty for my needs, but the size can easily be increased later.CPU- Code-server recommends at least 2 CPU cores. I have a quad core CPU in my server, but I only allocated 2 cores because I won’t be running anything resource intensive. Set CPU type to HOST for best performance.Memory- Code-server recommends at least 1 GB of RAM, I chose 4 GB.Network- Proxmox should default to a bridge connection, which behaves as if the VM were directly connected to the host’s network.
Click Finish to create the VM. Start up the new machine, and finish the installation process for your Linux distribution. Since I’m installing Arch, I ran the archinstall script to speed things up. I created a user account, chose the best-effort partitioning for disk configuration, and selected the minimal profile. With the installation complete, reboot the VM and we should be presented with the login screen.

Installing and testing code-server
We can now install code-server. From the Linux VM, access the terminal and run the following command:
curl -fsSL https://code-server.dev/install.sh | sh
This script should automatically detect your package manager and install code-server. After the installation is complete, let’s try it out. First, edit the code-server configuration file located at ~/.config/code-server/config.yaml. Set the bind address to 0.0.0.0:8080 so that code-server will listen on the VM’s local IPv4 address. I also changed auth: password to auth: none to disable password authentication.
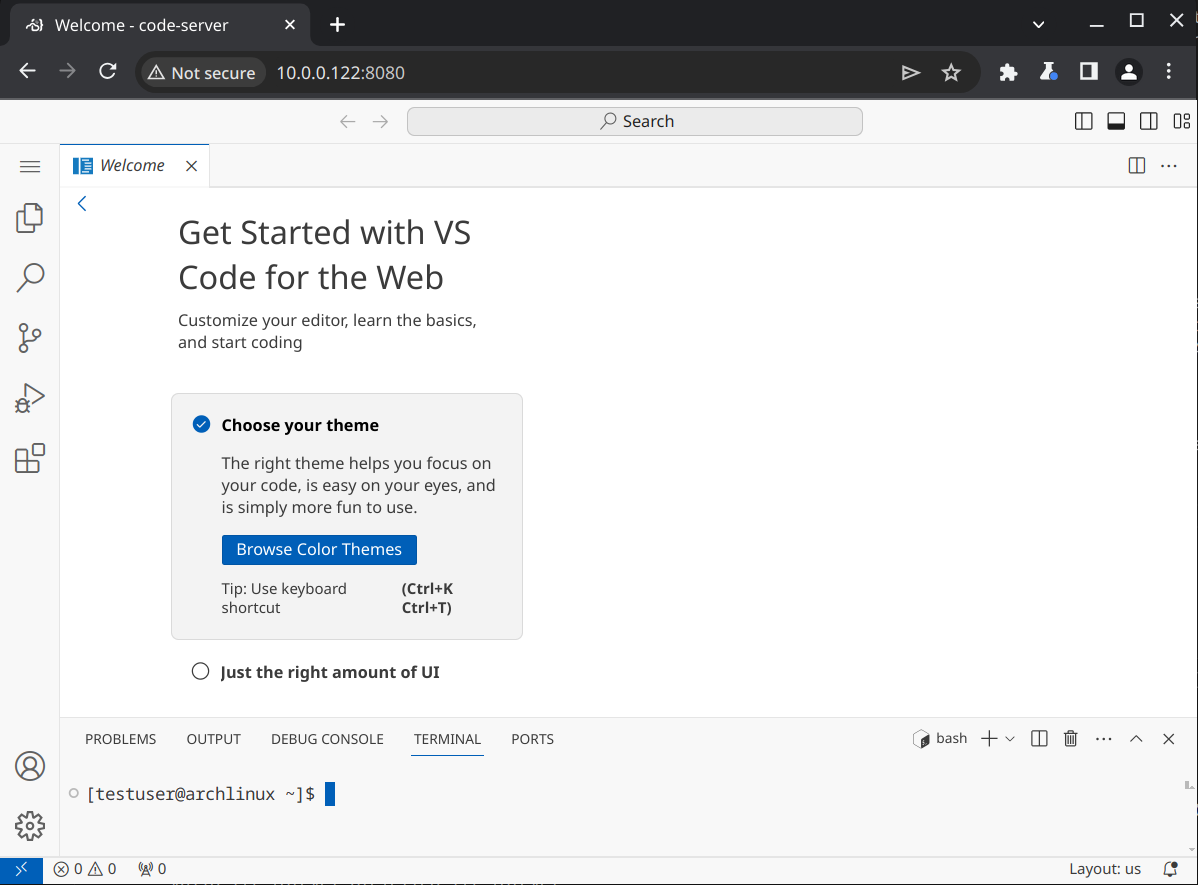
We’ll need to know the local IP address of our VM, so run the ip addr command to find it. Start up the server by running code-server. From another device on the same network as the Proxmox server, enter the IP address into a browser and connect to port 8080. This should open up VS Code:
At this point we can only access code-server on our local network, through an unencrypted HTTP connection. We’ll address both of these issues next.
Using Tailscale to connect to our server
First, we need to install Tailscale on our VM using the install script. Simply run:
curl -fsSL https://tailscale.com/install.sh | sh
Start Tailscale with sudo tailscale up and follow the authentication link provided to add the VM to your Tailnet. You may need to reboot the VM for Tailscale to work properly.
We should now have access to our VM through Tailscale. Open up the admin console for your Tailscale account, and you should see the VM listed under the MACHINE column. Next to that, the ADDRESSES column will list out the addresses we can use to access the code-server.

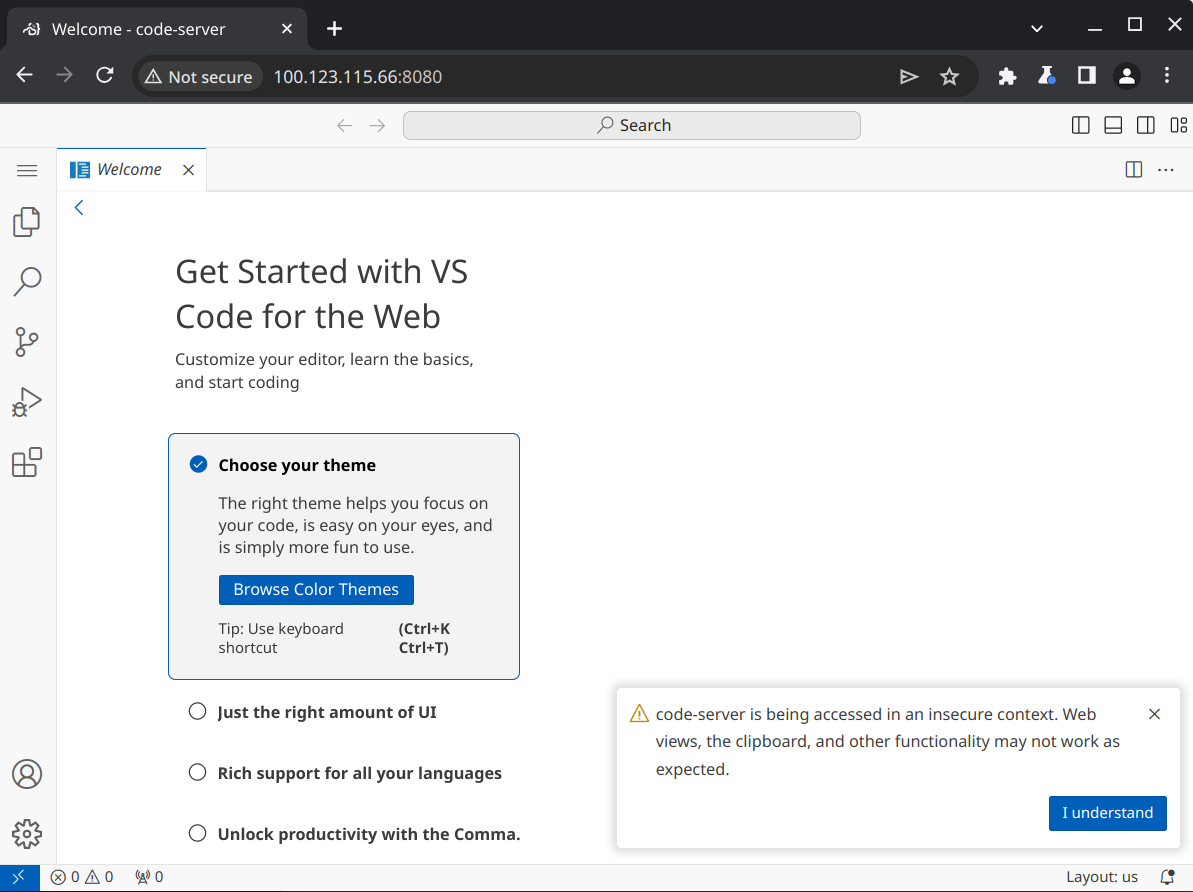
Make sure both Tailscale and code-server are running on the VM. Then, on another device with Tailscale installed and connected to the same Tailnet, enter one of those addresses into a web browser and connect to port 8080. You should once again see VS code in your browser - but this time, we are connected through Tailscale rather then the local network.
Requesting a TLS certificate for HTTPS
We can now access code-server from any device connected to the same Tailnet - including our iPad. Our Tailscale connection is encrypted and secure, but code-server will see the HTTP URL and limit some features. To access code-server over HTTPS, we can provision a TLS certificate for our VM.
First, we need to enable HTTPS certificates within Tailscale. From the Tailscale admin console, select the DNS tab and scroll to the bottom of the page. Click the Enable HTTPS button.
We can now request a TLS certificate, provided by Let’s Encrypt. Keep in mind that when you do so, your device’s Tailscale name will be placed in a public ledger. To request a certificate, run sudo tailscale cert [domain], filling in the Tailscale domain of your VM. If you don’t know the correct domain you can find it by checking the Tailscale admin page, or by running tailscale cert, as shown:

After requesting the TLS certificate, we should have a [domain].ts.net.crt and [domain].ts.net.key file. Move these files to a permanent location - I placed mine within /etc/keys. We’ll need to change the permissions of our .keys file so that code-server can read it, which we can do with the following command:
sudo chmod 644 [domain].ts.net.key
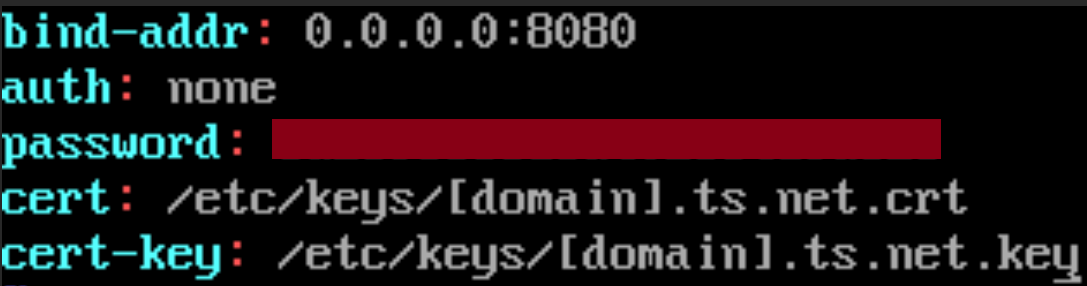
Next, we need to edit the config file so that code-server can find and use our certificate. Open up ~/.config/code-server/config.yaml, and set cert: and cert-key: to the location of the files we moved earlier. The final config file should look like:
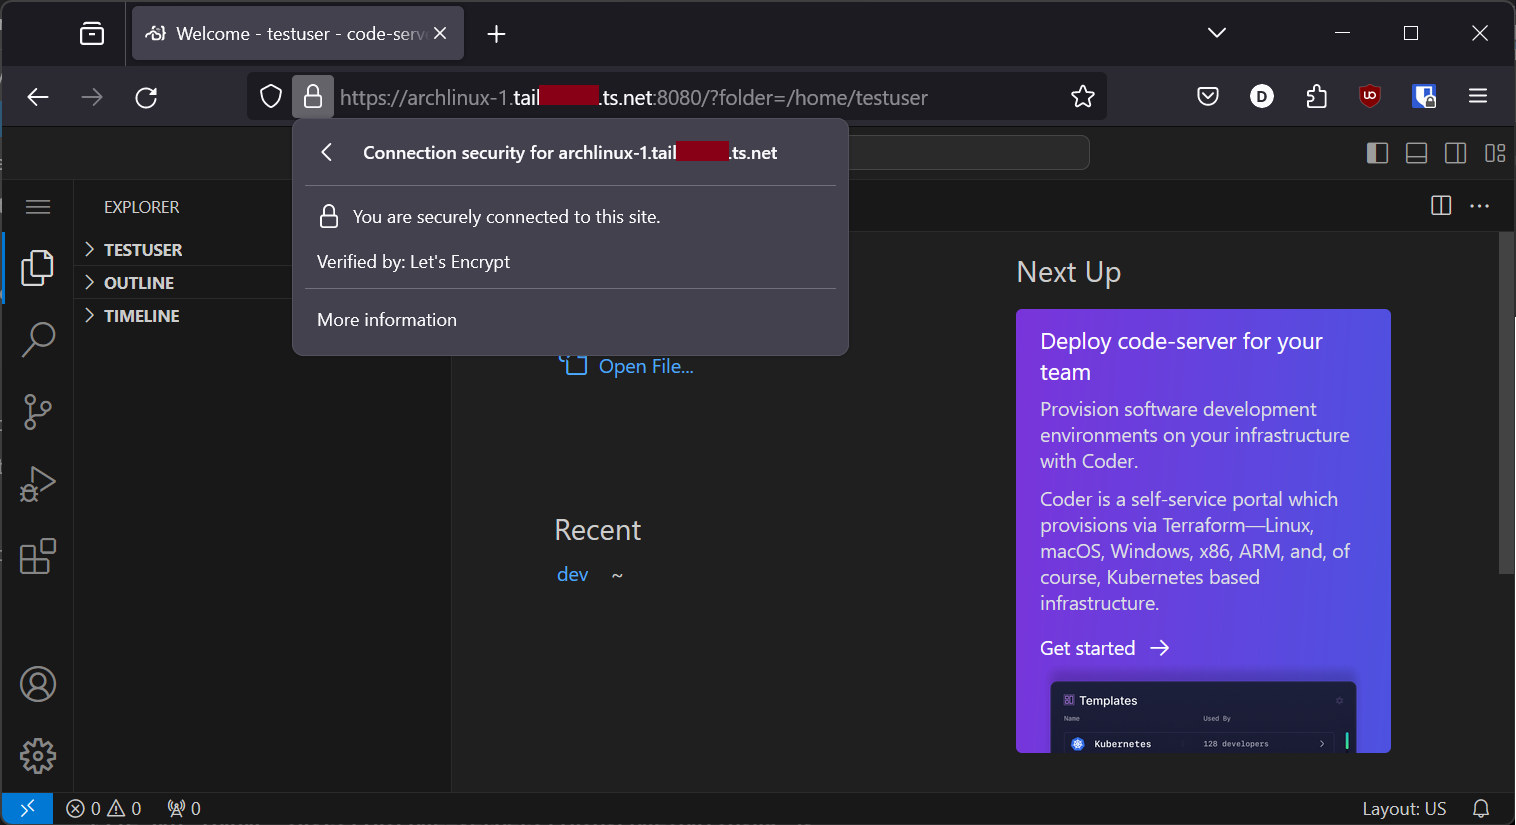
With Tailscale running, start up code-server. Then, on another device connected to the same Tailnet, navigate to the domain that we previously requested the TLS certificate for. We should now have a secure HTTPS connection to our code-server, verified by Let’s Encrypt:
Accessing on the iPad
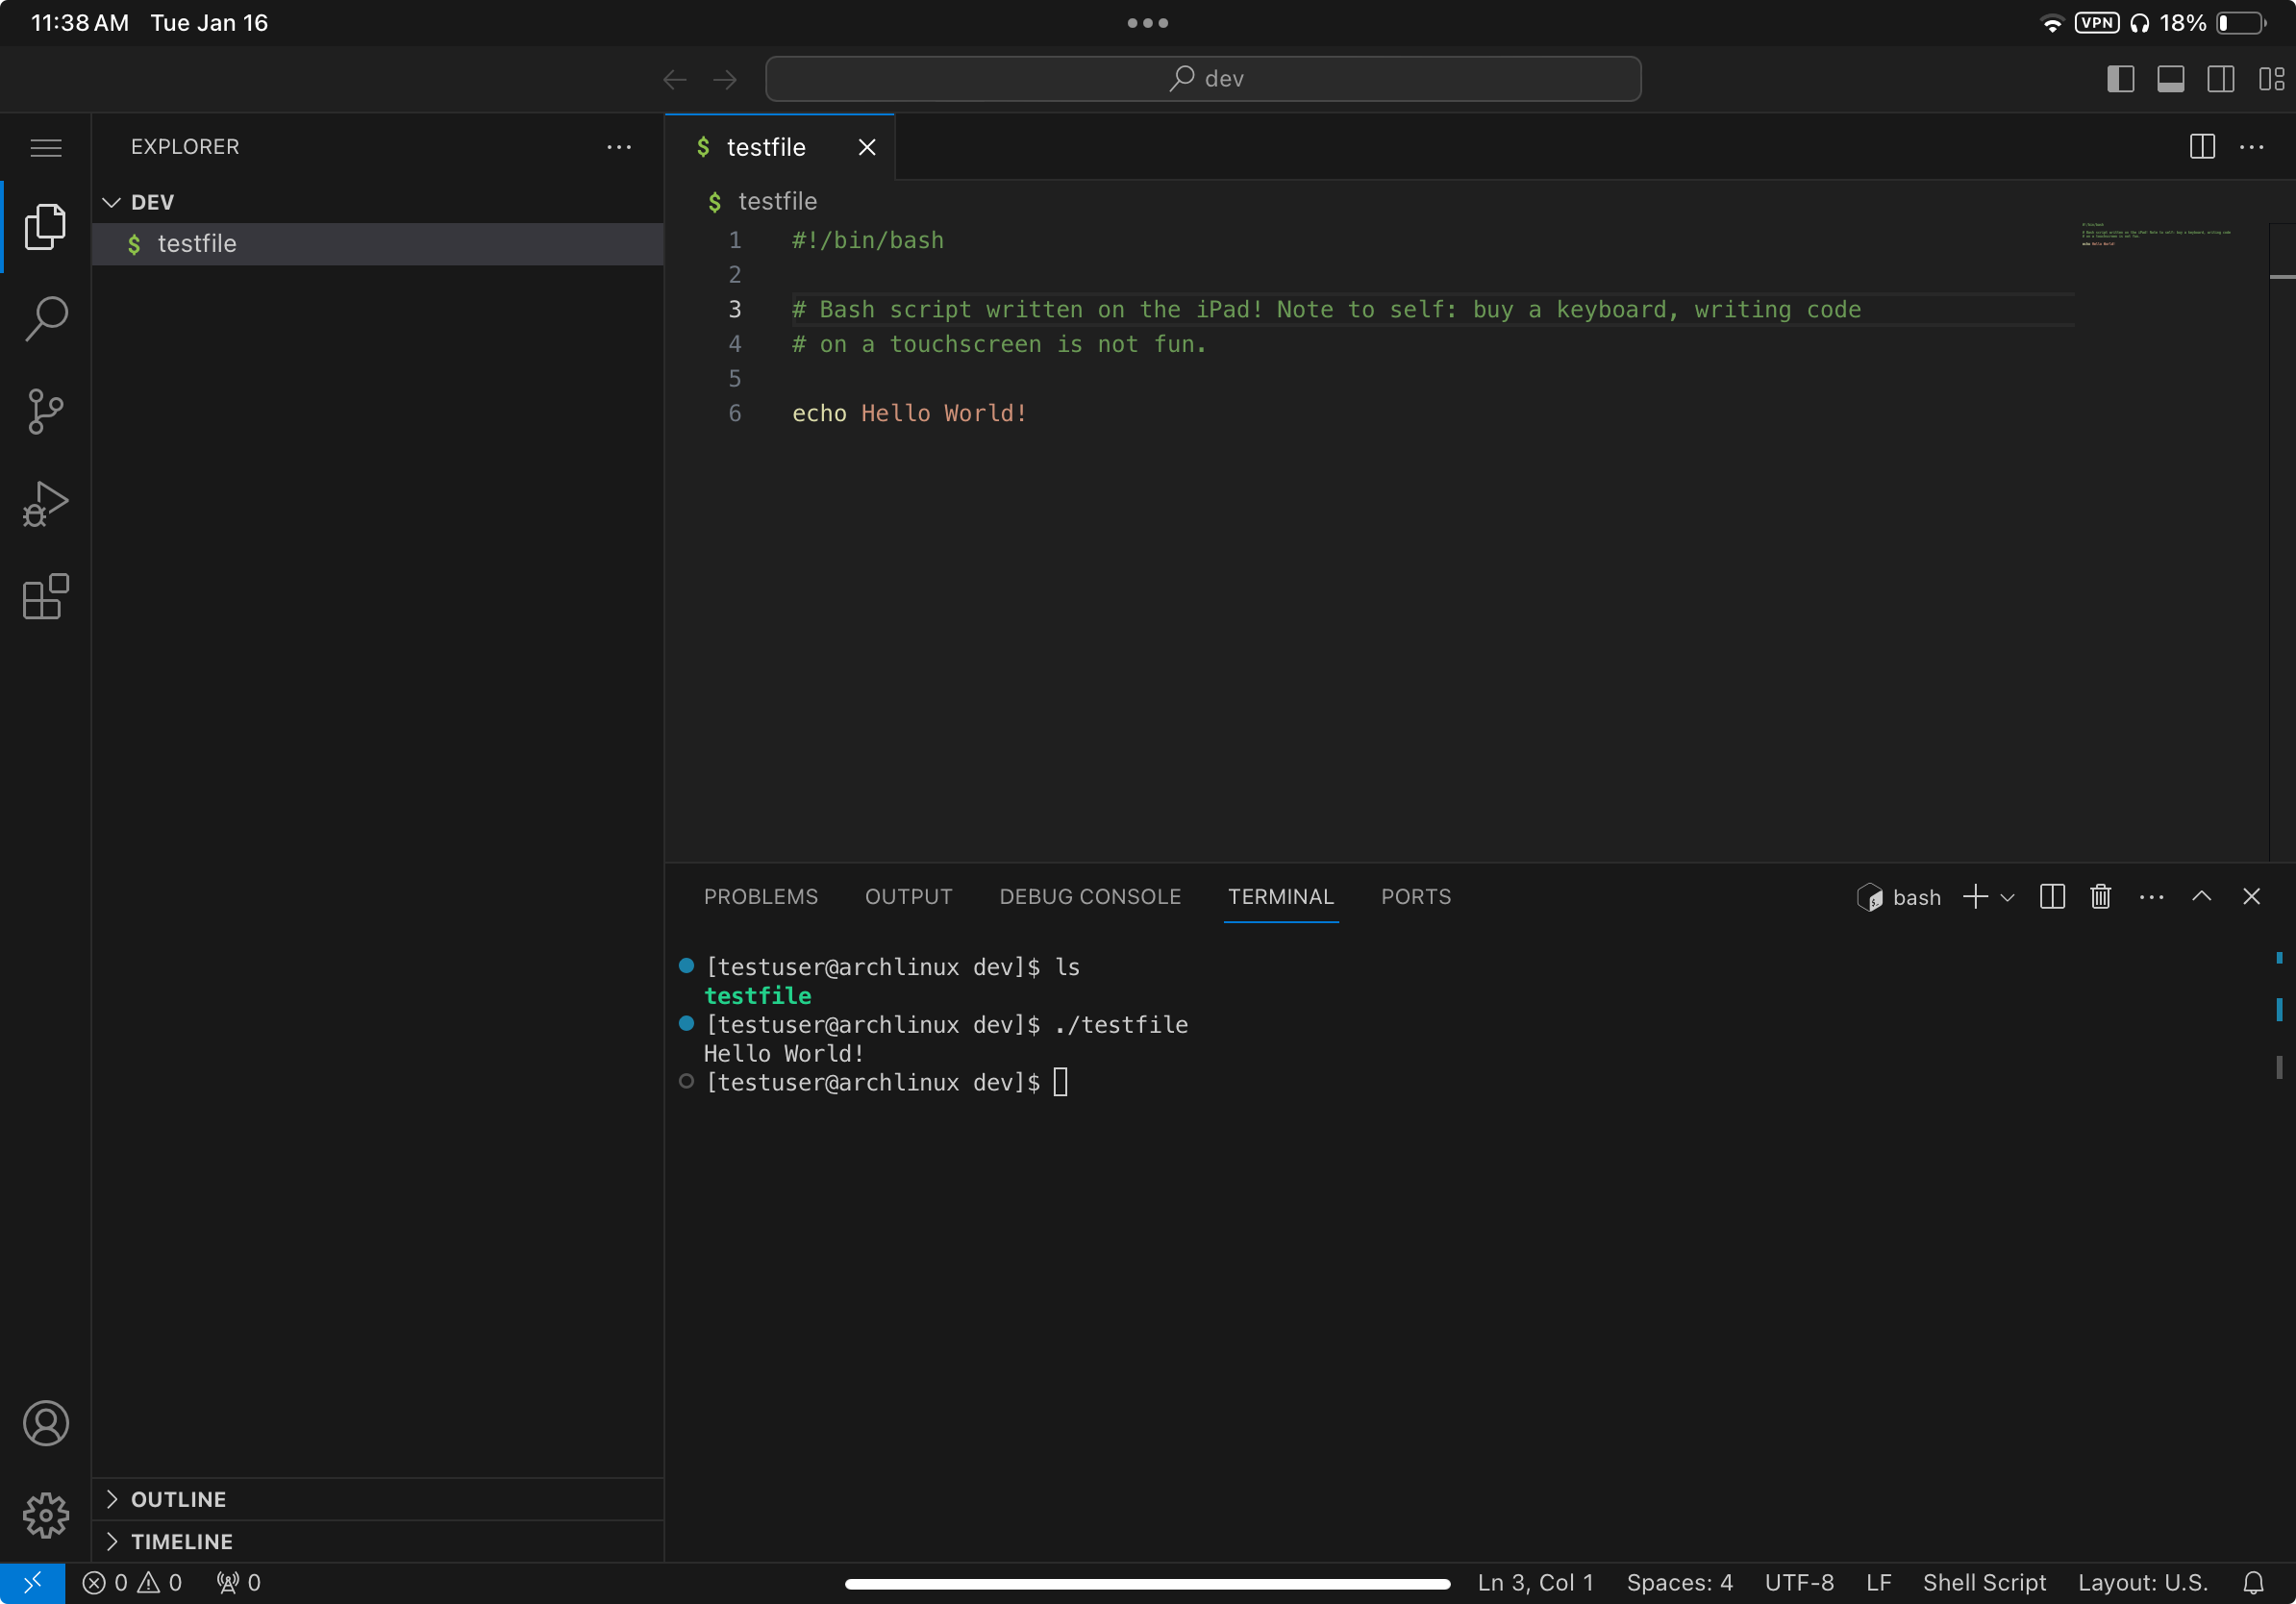
To access code-server on the iPad, first install the Tailscale app and connect to the Tailnet. Then open safari and enter the domain of the VM. If the connection fails, remember to use HTTPS and connect to port 8080. Once we’ve reached code-server, we can make a shortcut for instant access. Tap the share button, then Add to Home Screen. We now have a convenient short cut on the home screen - click it to open up VS Code and access a Linux development environment!
Conclusion
In this guide we walked through the process of securely hosting code-serve so that we can access VS Code through a web browser. We now have a consistent Linux development environment that we can reach not just through the iPad, but from any internet connected device!