(PROJECT) ClockUI - Raspberry Pi Smart Clock built with PySide6
Introduction
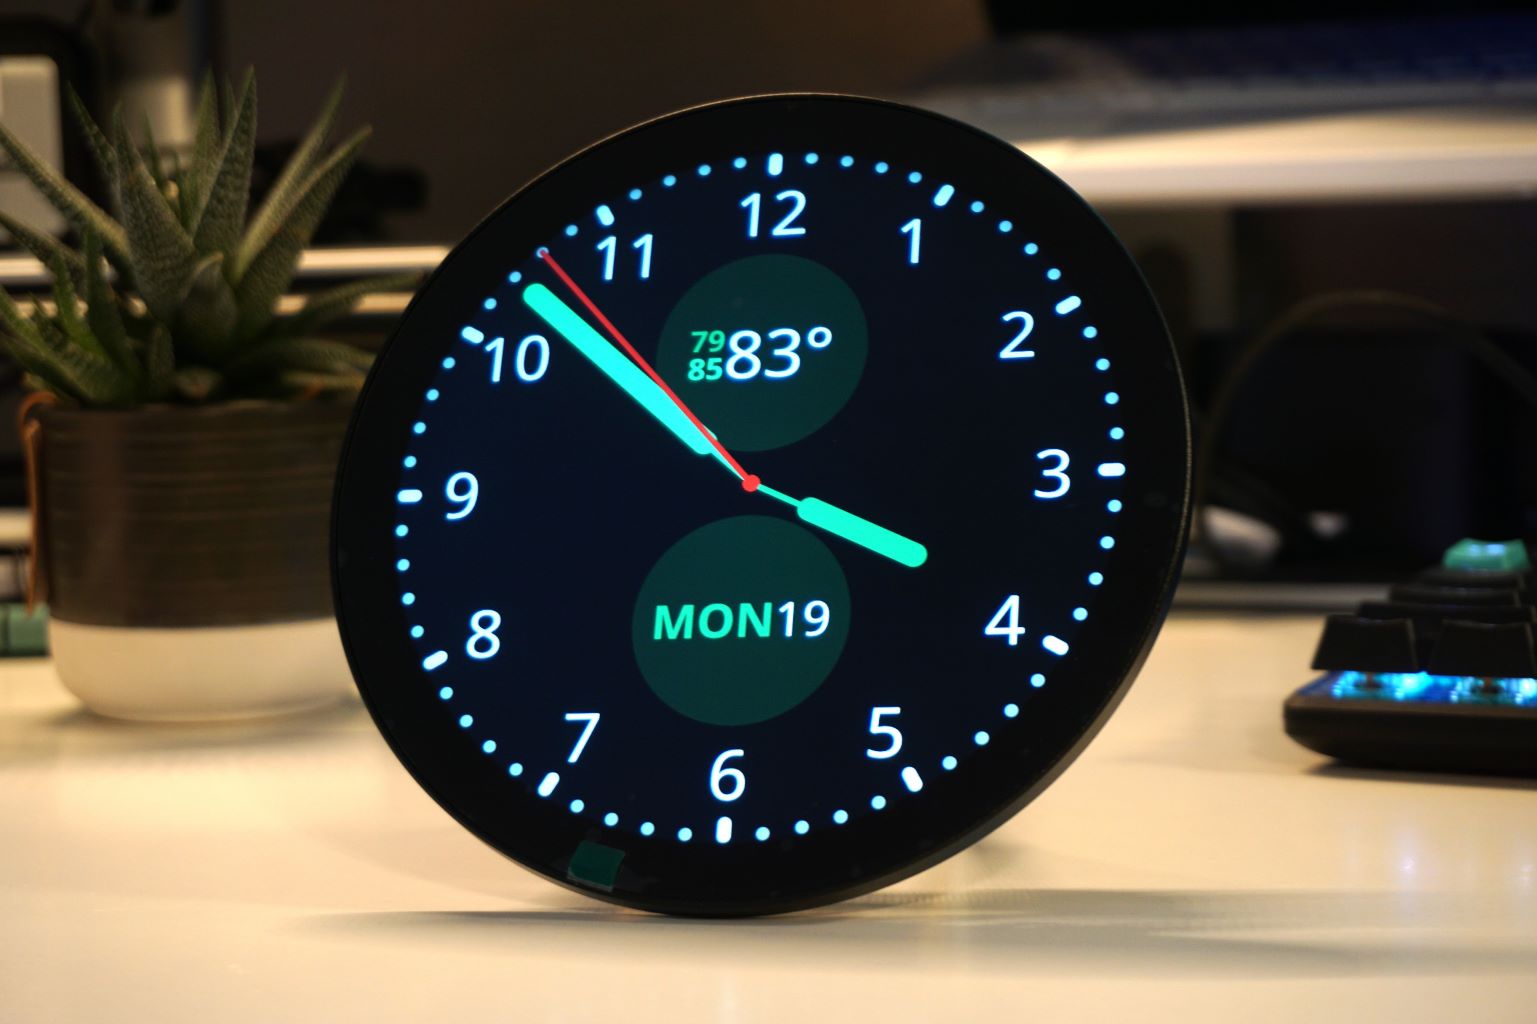
While scrolling through Amazon I stumbled upon a rather interesting piece of tech: a 4” round LCD display. While circular displays are quite common on smart watches, I’ve never seen one larger than an inch or two and decided to pick it up. A round LCD provides a unique platform for a wide range of interesting projects, and I decided to create the obvious: a Raspberry Pi based smart clock! I put together a small app called ClockUI based on PySide6 that provides a collection of clock faces with the time, date, and live temperature data. The app also has a basic settings page and allows the users to select different color themes. Check it out on GitHub here!
My intention with this project was to gain a bit of experience with UI design and the Qt Quick framework, and admittedly ClockUI in its current form is still quite basic. It features 4 different clock faces, a basic settings menu, and the ability to choose a global color theme. Perhaps calling ClockUI a “smart clock” is a bit of an exaggeration at its current stage; the extent of the smart functionality is live temperature data from OpenWeather with the current temperature and daily high/low. However, I hope to add additional features in the future!
Background
I did some research on various UI frameworks I could use to make ClockUI a reality, and ultimately settled on PySide6. While I had no prior experience with Qt Quick, PySide6 provides Python bindings for the underlying Qt framework, making it easy to get started and I found QML to be very intuitive for handing the UI side of things. This guide was a great starting point..
Another plus with PySide6 is that it can easily run on Linux without a desktop environment with the use of the ‘eglfs’ plugin. This platform plugin allows ClockUI to launch directly from the CLI and run in full screen mode without the overhead of a full Linux desktop. My goal with this project was to provide a seamless user experience where the Raspberry Pi boots straight into ClockUI (much like how an off-the-shelf embedded device would work).
Behind the scenes, getting the current date and time for the clock display was trivial with Python’s built-in time module. I decided not to use an RTC and instead rely on time sync via NTP for accurate time tracking because the Pi will always be connected to a network. For weather data, I used OpenWeather’s current weather API; the free tier provides all the information I need. API calls are handled in a separate worker thread instead of the main UI event loop, ensuring that the UI remains responsive.
Tour of the UI
Clock Faces
As mentioned earlier, ClockUI features a collection of clock faces, a theme selection menu, and a settings menu. Currently, the settings page allows the user to toggle 12 or 24 hour time, metric or imperial units for weather, and adjust the brightness of the display (assuming a compatible LCD is used). All of the available clock faces, in the order that they are presented to the user, are shown below:
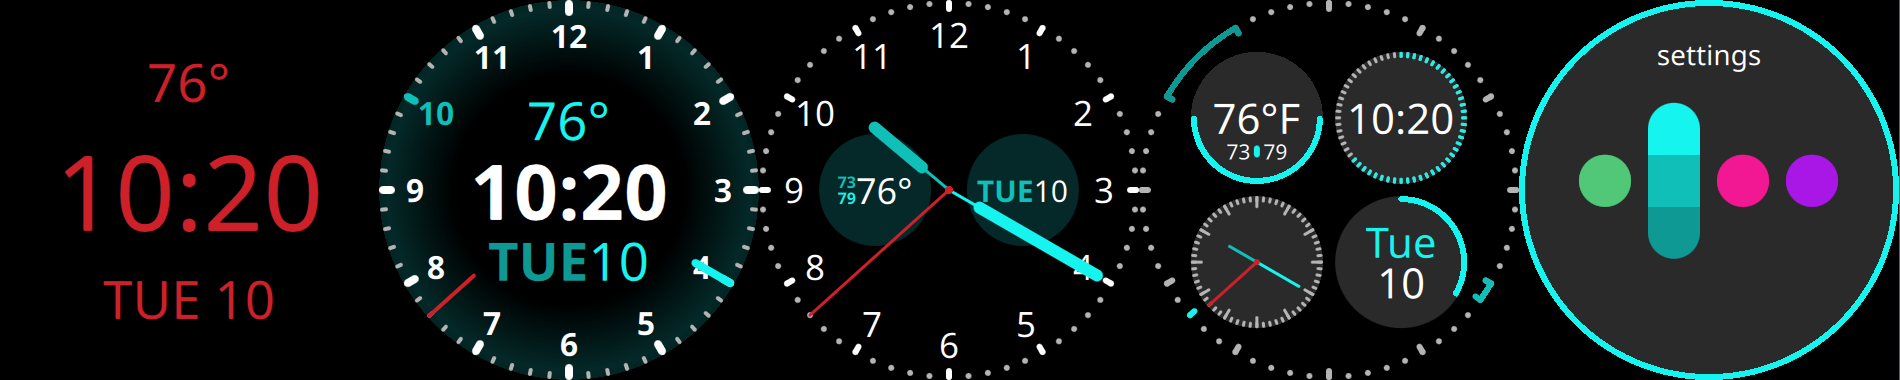
Switching between clock faces is achieved by swiping left or right in the center of the touch screen, or clicking and dragging with a mouse cursor. The following GIF shows basic UI navigation, which is explored in more detail below.
Settings and Theme Selection
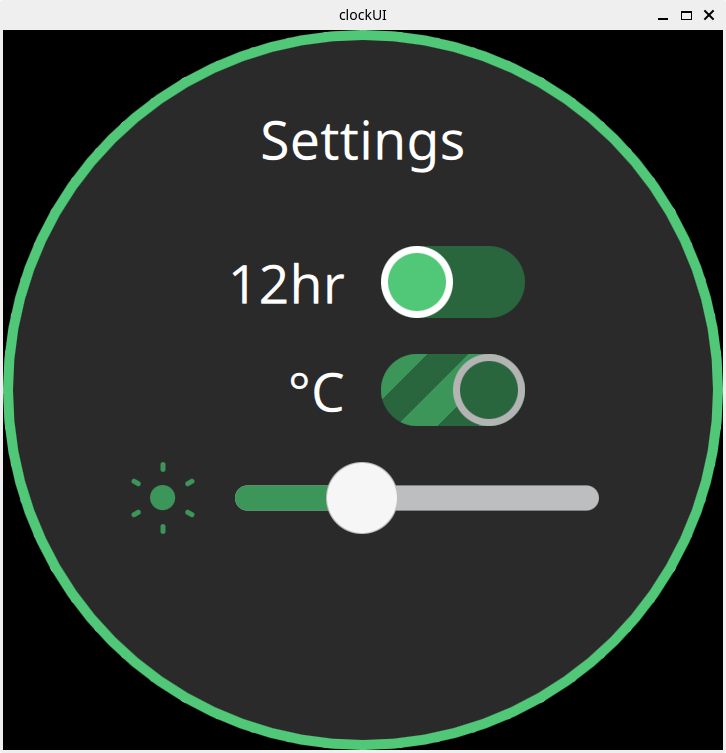
ClockUI has a settings menu that allows the user to do the following:
- Toggle between 12hr and 24hr time
- Toggle between metric and imperial temperature units
- Adjust backlight brightness of connected DSI display
The settings menu is shown below:
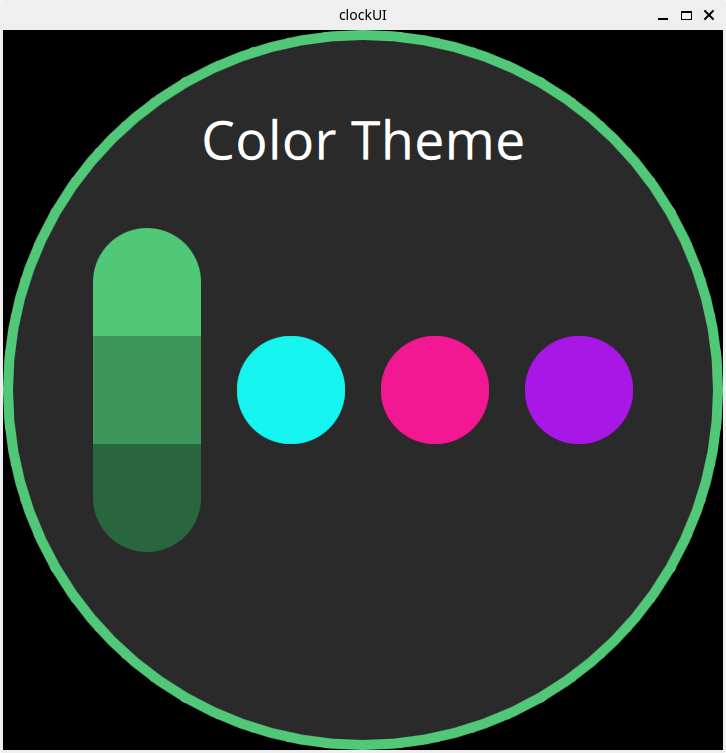
The theme menu allows the user to select a global color theme as shown below:
Navigation
Swipe gestures are used to switch between clock faces and access the settings or theme menu. The display is split into three horizontal areas, each of which responds to a specific swipe gesture. The top and bottom areas occupy 1/4 of the display, while the center area takes up half. Swiping down from the top 1/4 of the display opens the settings menu, and swiping up releases it. Swiping left or right in the center 1/2 of the display changes the clock face, and swiping up from the bottom 1/4 of the display opens the theme menu. With the current implementation, each gesture is only recognized within it’s assigned display area; this means that, for example, swiping left or right in the upper fourth of the display will not change clock faces.
UI navigation is shown below:
Error Handling
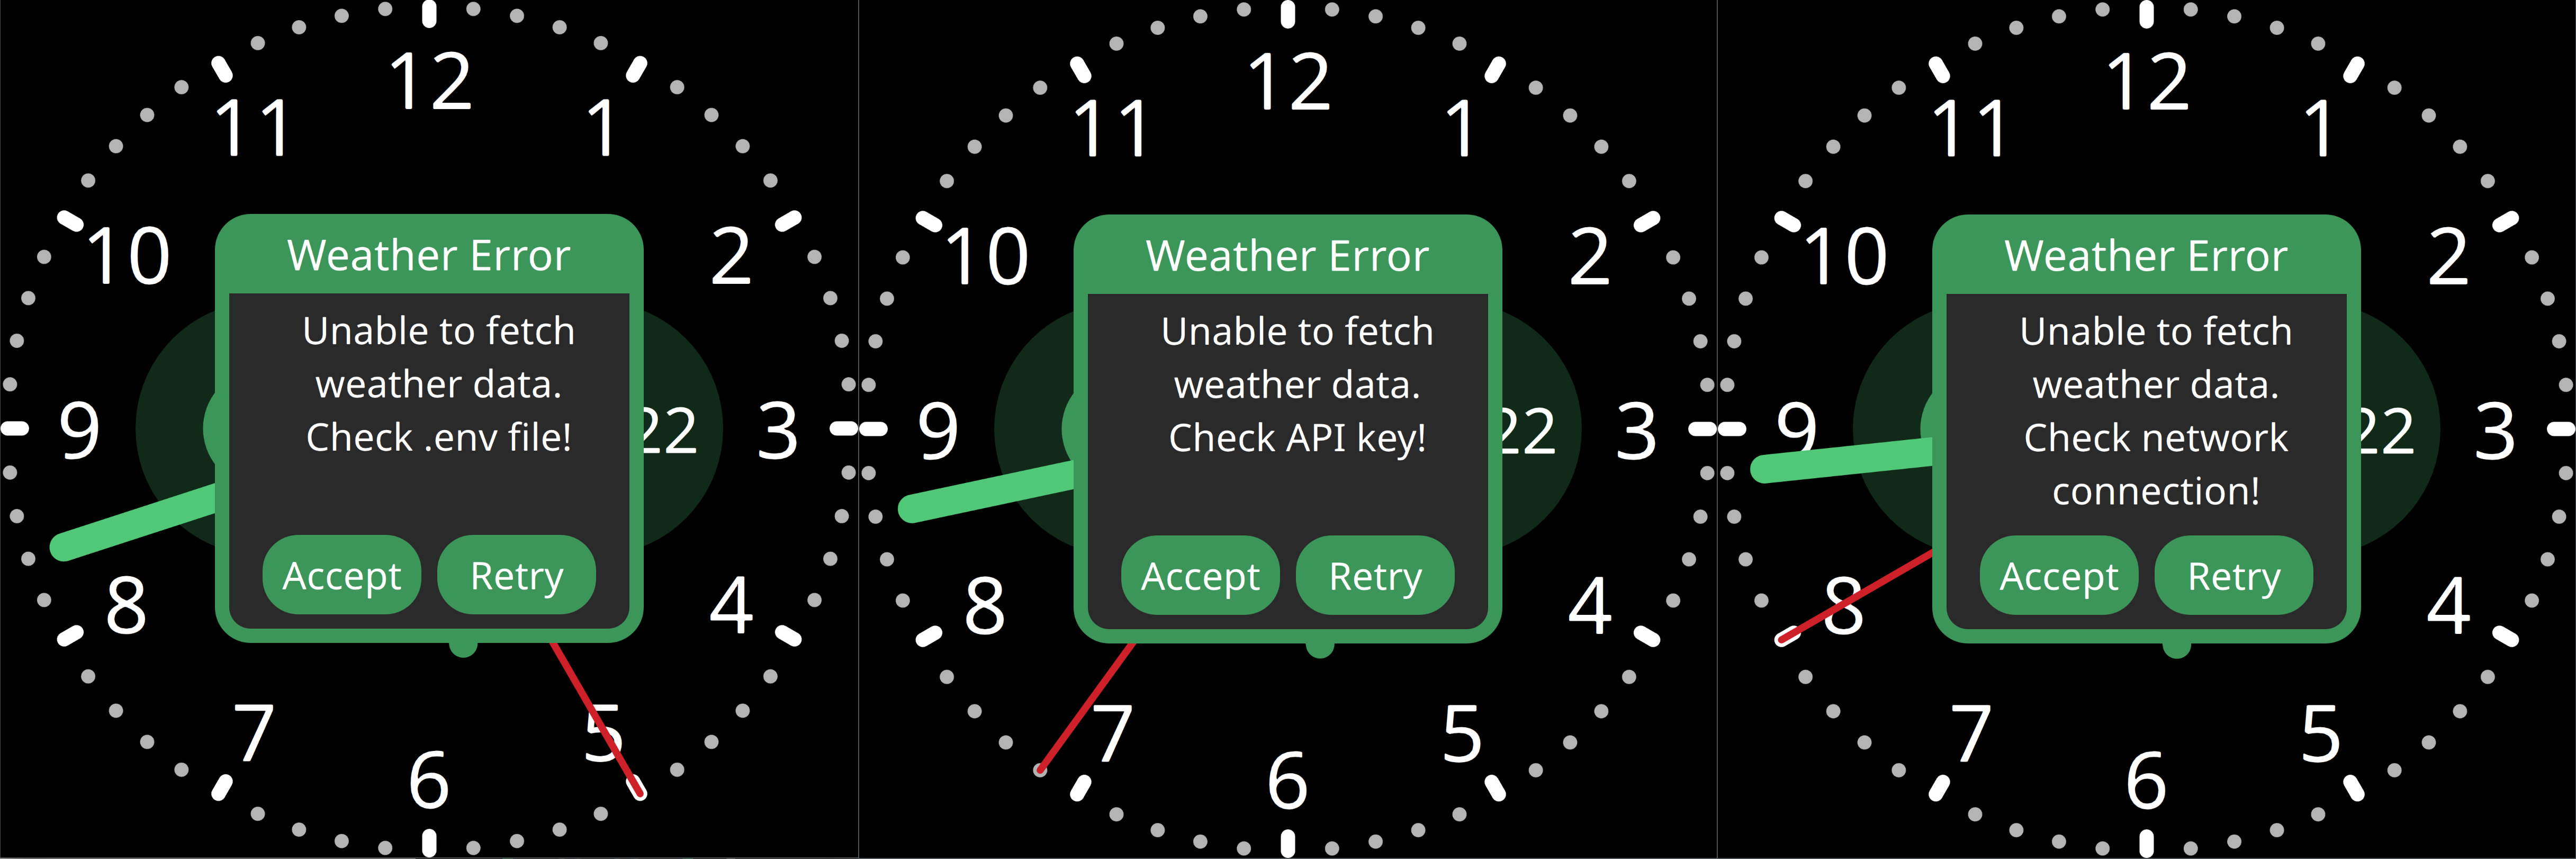
In an effort to make the app more user friendly, I’ve added a few error messages to ClockUI to help troubleshoot issues with the OpenWeather integration. These messages will be triggered under the following circumstances:
- The .env file containing the OpenWeather API key is missing
- The .env file is present, but the API key is missing or invalid
- The .env file is present, but the API URL cannot be reached
The corresponding error messages are shown below:
Hardware
Let’s take a closer look at the display itself. As mentioned earlier, it’s a 4” diameter LCD with 10-point multi-touch and a resolution of 720x720, sold by Waveshare. Here’s a link to the Amazon page. The LCD uses IPS technology, so viewing angles are excellent and contrast is decent. It also supports software adjustment of the backlight brightness, which is implemented in the ClockUI settings page.
The back of the display has mounting points for a Raspberry Pi, and I ended up using a few of the extra standoffs that came with the it to put together a makeshift stand. A single DSI cable to the Pi handles power, video, and touch support.
I used a Raspberry Pi 4 2GB for ClockUI, but I expect a Pi 3 should be able to handle it with no issues. RAM is not an issue, the app could easily run on a 1GB Pi.
Setup
Installation
Setting up a smart clock with ClockUI is fairly simple. To start, you’ll need a Raspberry Pi (model 3 or later recommended) with Raspberry Pi OS Lite which can easily be installed using the Raspberry Pi Imager tool. With the Pi connected to a network, install git by running apt install git and clone the repository by running git clone https://github.com/danm11r/clockUI.
Then install the necessary PySide6 packages in a Python virtual environment using the included install script. To run this script, make it executable with chmod +x install.sh and execute with ./install.sh.
Alternatively, you can install everything using pip with the included requirements.txt file as shown:
python -m venv venv
source venv/bin/activate
pip install -r requirements.txt
The install script will also install the Noto font family because the app uses the noto sans font. This font can be installed manually with the following command: sudo apt-get install fonts-noto -y.
You should now be able to run the app. From the clockUI directory, run the following command to launch the app using the OpenGL renderer: python3 main.py --platform eglfs.
If you want to launch the app automatically upon startup, you can do so with crontab. First make the included start.sh script executable by running chmod +x start.sh. Then create a crontab to run the start script with sudo crontab -e. Add a new command to run at startup:
@reboot ~/clockUI/start.sh
Unless you cloned the clockUI repository to your home directory, you’ll need to customize the file path in the above command. Now clockUI should launch when the Pi boots up!
Screen Resolution
ClockUI is designed to easily scale to any display resolution. The size of the clock faces are determined by the height of the main application window, so if you launch ClockUI in full screen mode using the eglfs method it should automatically scale to fit the height of you display. If you need to change the size of the clock faces manually, you can do so by changing the clockRadius variable in the main.qml file.
OpenWeather Configuration
ClockUI expects to find a .env file that contains the OpenWeather API key, zip code, and units for temperature data. To set this up, simple copy the template file .env-example present in the repository, rename it to .env, and fill in the necessary information. The contents of .env-example are shown below:
# APU key, zip code, and weather data units for open weather API call

API_KEY = ""
ZIP_CODE = ""
UNITS = "" # either imperial or metric
Conclusion
I had a lot of fun working on this project and I’m quite happy with how it’s turned out so far. I’ve been using ClockUI continuously for the past few months and I think the round LCD is a really neat platform for a smart clock, and I tend to stick with the analog clock face specifically because it serves as a great showcase of the form factor. I plan on returning to this project eventually with new clock faces and additional features, as time permits! Once again, here’s a link to the GitHub repository if you want to check out the project.